FAQ
What Should I Expect My first Week?
A Week In Stone
What You Might Expect Your Week’s “Art of Carving” Work To Look Like
(Sculpture instructors are available all week to help guide you and
answer questions)
Day One:
Check in at the registration tent. Attend a stone safety talk. Find your designated spot and set up your canopy and work space. Locate where to find drinks and snacks, port-a-johns, and first aid station.
Introduce yourself to your neighbors! If you brought a model/maquette or drawings with you, start transferring your ideas to stone with a pencil or grease pen. If you have no idea what to carve, start taking off stone (+- 30%) to see what the stone tells you.
Using a pitch, point, diamond rotary saw, or drill, start removing as much stone as you can. Your first day is about large chunks coming off. Be bold and don’t be afraid! Use a rake to clean your area as you work to prevent tripping over debris.
Day Two:
The second day is about finding the shape of your idea and getting rid of the block shape of your stone. It’s still a day of big chunks coming off as well as small bits. Using a diamond blade saw you cut kerfs and knock out sections to get closer to the shape of your piece. Be bold and don’t be afraid! Attend the Bybee factory tour today!
Use a rake to clean your area as you work to prevent tripping over debris.
Day Three:
Day three sees a change in the selection of tools. You should be completely off the block by the end of this day. As you begin refining the shape of your sculpture the toothed chisel becomes your friend. It’s a good day to cut smaller kerfs and speed the process of stone removal. Day three is also a day that may lead to changes in your plan or reveal opportunities you hadn’t considered.
Use a rake to clean your area as you work to prevent tripping over debris.
Day Four:
The fourth day is much like the third day. It’s about refining shapes and finding hidden opportunities. You might start using an angle grinder today to smooth out rough areas quickly but be aware that it creates a lot of dust that effects everyone around you.
Use a rake to clean your area as you work to prevent tripping over debris.
Day Five:
On this day it’s time to start introducing the use of flat chisels as you get closer to the finished shapes of your work. If you haven’t found places for holes and cavities before now, start looking. They make your work seem lighter and less like a block of stone.
Use a rake to clean your area as you work to prevent tripping
over debris.
Day Six:
Have you considered how you are going to transport your stone yet? By this day 2/3 of your stone should be on the ground and swept away but your piece could still weigh several hundred pounds if not more.
Spend the day smoothing and refining, using riflers where necessary or sanding blocks. You will probably be using more hand tools at this point.
Use a rake to clean your area as you work to prevent tripping over debris.
Day Seven:
On your final day spend the morning polishing and cleaning your sculpture, looking for areas that might need a little more attention to complete your work. The afternoon is a time for cleaning tools and putting things away for travel, packing your area up and returning anything you may have borrowed. Don’t forget to get
contact information for new acquaintances and take photos of other artist’s work!
What did you learn this week?
• I picked a bigger piece of stone than I needed.
• It takes a lot of effort to remove stone in the beginning.
• Use a bigger hammer!
• I should ask more questions.
• A maquette is easier to use than sketches.
• Using pneumatic chisels with too much force breaks stone.
• Breaking stone isn’t the end of the world.
• The judicious use of power tools save time but they don’t solve all problems.
• I should drink more water.
• Taking a break every 30 minutes helps energize me.
• Watching other people work helps make me work smarter.
• This is the best week of my year!
What will my space look like?
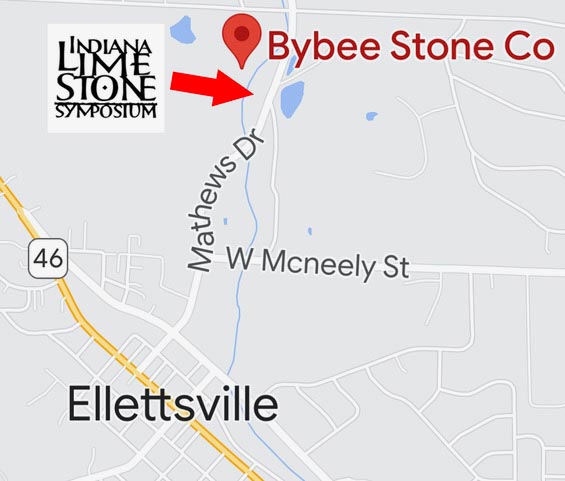
The site is in a rural setting across the road from the Bybee Stone Company, an historic working limestone mill. If you are coming to one of the Art of Carving sessions you will have an outdoor work area, roughly 10 x 10 feet square. A banker (heavy wooden workbench) or a large piece of stone will be centered on your site as a worktable. You will have airlines and electricity. Your stone will be placed on the banker stone table as you specify. Bring your own pop-up canopy (with weights or tent stakes), chairs, a fan, a work table, whatever you need to be comfortable.
For hand carvers we have a large canopied space. Tools and assorted sizes of stone are provided. Sorry, we cannot provide cut stone to order for the hand carving sessions.
When and where should I arrive?
Please check the session registration info for the hours of your session.
What will my stone look like and how much will it weigh?
All of our limestone is dimensional — sawn on all six sides from a larger quarry block. Limestone weighs approximately 150 pounds per cubic foot, so your 8 cubic foot block will weigh about 1200 pounds. If the mass or weight of the block intimidates you, you can start with a smaller piece by dividing it. We cannot divide your block in advance, but on the first day we will teach you how to split it yourself quickly and easily. If you wish to do this, please bring feathers and wedges (also called slips and wedges) and the drill and drill bit needed.
Can my block at the symposium be more than 8 cubic feet?
No. Available equipment limits us to this size.
What if I don’t know what I want to carve when I register?
Not everyone knows what they want to carve when they register. If you are not ready to send dimensions for your stone with your registration you have until mid-May to send them. Please email them to Steve Tourney (steventourney@gmail.com). If your dimensions are not received by the due date there will be insufficient time to cut your block. If you are really not sure what to order, specify either a cube, i.e. 2’ x 2’ x 2’ or a rectangle, i.e. 4’ x 2’ x 1’, and sketch ideas within this format. You must tell us in advance which side of the stone should rest on the banker.
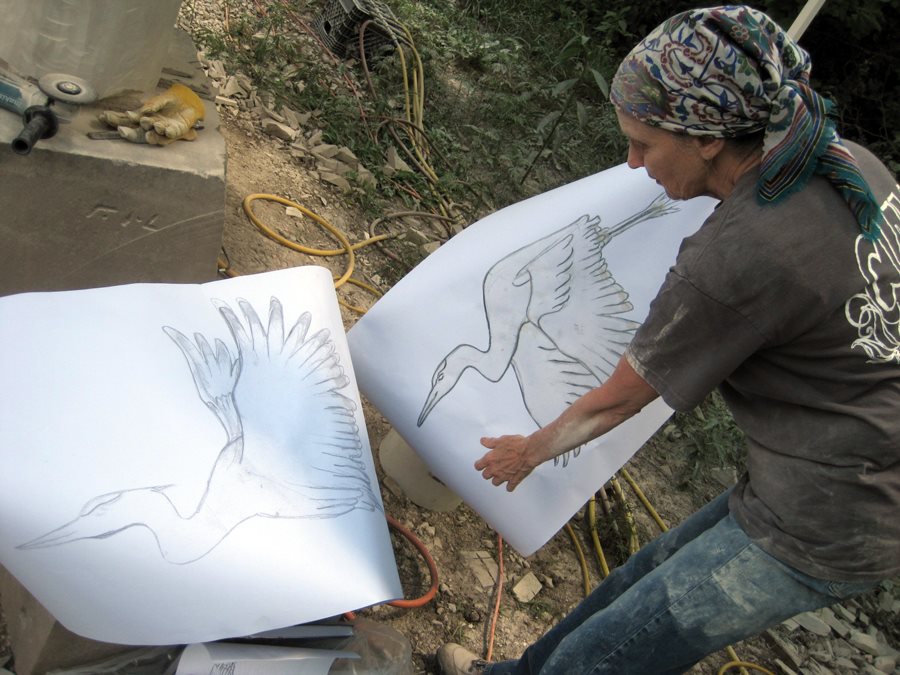
How do I turn my idea into a sculpture?
You can make sketches, a model, or both. Make a 1:1 scale sketch of at least two sides of your sculpture. You can transfer the measurements from the drawing to your block of limestone. Alternatively, you can make a 3-dimensional scale model out of oil-based clay or another medium. Some sculptors use actual objects as their model, such as small statues of figures or animals, or an object from nature. The model need not be actual size.
How will my stone by orientated on the banker?
Your stone will be set on the banker to your specifications. Think about how you want the stone sitting when you begin work. If you think about your first cuts, it will help you visualize how you want the stone set. Please provide this information when you send your dimensions.
What tools will I need?
Hand-carving: If you plan to attend the Hand-Carving workshops all tools will be provided. You will need to bring a pair of safety glasses and wear shoes with closed toes. You may want work gloves and a mask as well.
All other sessions: For any of the other workshops it depends on whether you plan to work by hand or with the air hammer. Working by hand is the best way to learn about stone and the carving process. If you choose to work by hand during Session I or II you should bring a 1.5 or 2 pound hammer with a head of soft steel. You can use the hand tools that are supplied for the Hand-Carving workshops, or buy your own. The Compleat Sculptor will be on site once during each week with the “Candy Store” of tools, gadgets, and other goodies for the stone carver. In addition, Bybee Stone Tool Co., makers of the best carbide chisels for limestone, will have pneumatic and hand chisels for you to order or purchase, they are open business hours. Tempered steel is fine for limestone; you do not need carbide hand tools. A simple list of chisels needed are: a point, a flat, a toothed, a rondel and/or a gouge. You will start with the point to remove excess stone to find the form of your sculpture. The tooth chisel is used next for further refinement, then you will use flats for finishing. You will need both a straight and a curved flat chisel. You will also need a sharpening stone. A diamond sharpening stone, medium grit is recommended. If you will be working with an air hammer, favorites are the Italian Cuturi hammers. Type U is a good size for limestone, and operates smoothly with the least amount of vibration. Type V is smaller and very good for delicate work and soft stone. The American-made hammers, Trow & Holden, and Dallett, are also very good and can be easily serviced if needed. You will need M type quick release fittings on your air hammer or air hose (a male M type quick release is required to connect to our air hoses). An angle grinder fitted with a 4-inch or 7-inch dry-cut diamond saw is very useful. If you have the blade flush-cut mounted you will be able to cut more. A bench grinder with one wheel for carbide and one for tempered steel will be on site. Anti-vibration gloves are strongly recommended.
What else should I bring?
We will be working outdoors rain or shine. The site is partially wooded, but we cannot guarantee that you will have a shady spot. You will need a 10 x 10 foot pop-up style canopy to place over your work area for protection from sun and rain. One without a center pole is best. Bring a folding chair or stool, a small folding work table, and whatever else you need to be comfortable. You will need a 25 foot outdoor extension cord, safety glasses, sturdy shoes (not open toe) or work boots, work gloves or anti-vibration gloves, hearing protection, insect repellant, sun block, and a hat with a brim or a visor. If you forget something, nearby shopping includes Lowe’s, Menards, T.J.Maxx, Michaels, etc. Download a Packing List (PDF).
Can I purchase more blocks of limestone?
You can purchase additional blocks from Bybee Stone Company for about $100 per cubic foot. Blocks will be ready for you at the end of the symposium to take with you or to ship.
How will I get my sculpture home?
If you do not have a vehicle in which to transport your sculpture, please arrange for shipping by a freight company. We will see that your stone(s) are properly palleted and labeled. Specify that the trucker pick up the pallets at Bybee. You will have to arrange off-loading at your home address.
Will there be other activities?
Every Thursday morning there is a tour of the Bybee Mill, (more details about that when you are on site). In addition, we invite the public to come see carving in action every Thursday afternoon from 1-4. Participants can interact at their discretion, the visitors are instructed in safety measures. On Sunday nights, after the excitement of the first day, we gather at a restaurant in Bloomington to relax and get to know one another. This is casual, come if you like, and all pay for themselves. During the week there are often informal dinners at local homes and restaurants. Presentations and field trips are also offered during the symposium, highlighting the history of the local limestone industry.


Where to Eat
Drinks and snacks are available to all of our participants throughout the day.
Lunches are provided, (including a vegetarian option), for an additional fee by choosing the lunch option when registering. If you bring your own, we have a refrigerator and microwave available.
Bloomington is just a few miles from Ellettsville. Find out why Bloomington was named one of the Top Food Towns in America in the 2012 Best of the Road competition, sponsored by Rand McNally and USA Today! One of only six small towns in the nation to receive the honor, Bloomington is proud of its food scene —from local farm-to-table restaurants to unique international flavors. Local restaurants, wineries, and breweries offer food and drink to suit any taste. See Visit Bloomington.